
Google has added a security feature (Factory Reset Protection) to its Android OS. After the hard reset process, the OS asks you to enter the last Google account used in the phone before performing the factory reset to verify the identity of the real owner of the phone. This feature is important and is intended to avoid misuse of the device during thefts. But at the same time, some users have got into trouble because of it, when they have forgotten their GMAIL or password credentials after the hard reset. So, in this tutorial, we have brought the latest method to FRP Bypass Samsung Tab S6 Lite with ADB Alliance x shield easily by following some simple steps.
The FRP feature has been added to the phones that are available on the modern Android systems (Lollipop, Marshmallow, Nougat, Oreo, Pie), The process of bypassing FRP in the latest versions of Google’s Android is becoming challenging with every phone and every system and every version has a specific way to bypass this problem.
Once you set up a Google Account in your Samsung Tab S6 Lite, the FRP is active, so after performing a Factory Data Reset, you’ll be required to log in to the GMAIL username and password that you set up on the device, so if your Samsung Tab S6 Lite is stolen or lost, the device can’t be used.
How to disable FRP (factory reset protection)
in your Samsung Galaxy J4+ device, The FRP feature will automatically Enable you as soon as you add a Google Account to your Samsung Galaxy Z Flip3 5G. If you want to disable it, you just need to delete your account.
How to unlock FRP Samsung Tab S6 Lite
- Power ON your Samsung Galaxy Tab S6 Lite
- Connect your Samsung Galaxy Tab S6 Lite mobile to your Wi-Fi and Go back to the Welcome page.
- Download the SamsungFrp2020 Bypass new Tool on your computer and click on SamsungFrp2020.exe

- Once the Tool Open click on Disable Drivers Signatures then Reboots your PC.

- Run SamsungFrp2020.exe again.

- Now Click on Bypass FRP and wait until the drivers Installing.

- On your Samsung Tab S6 Lite Device, A Easy firmware page was open
- Click on View.

- The Internet Browser opens automatically.
- Go to this link and tap on Click to Open Setting for Samsung:
- https://bit.ly/3ItcZE8

- First, in an open Phone, you need to restore the Alliance Shield X app in your Samsung Account
- Accounts and backup ==> Accounts ==> Add Account.

- Choose Samsung Accounts & sign in with the Samsung account that backup the Alliance Shield X app in it.

- Backup and restore ==> Restore data ==> Apps ==> Alliance Shield X ==> Done.

- Restore ==> Install ==> Wait until restoring complete.

- Done ==> Later ==> Go back to browser page.

- Tap on Click to Open Galaxy Apps:

- Update Galaxy store and wait until the installation finish.

- Again, Tap on Click to Open Galaxy Apps:

- Search for S8/S7 Launcher ==> Download and install ==> Open.

- Continue ==> OK ==> Let’s Go.

- Register with a new account on Alliance Shield X then sign in.
- Alliance Shield X Register page.

- Turn ON device admin ==> Next ==> Turn ON Knox ==> Next ==> Finish.

- App manager ==> Close ==> Service Mode.

- Search for Activities USB Settings ==> Open ==> Connect your Samsung Tab S6 Lite to the PC via USB cable ==>MTP + ADB ==> OK.

- Go back to the Home page then Connect your Samsung Galaxy Tab S6 Lite mobile
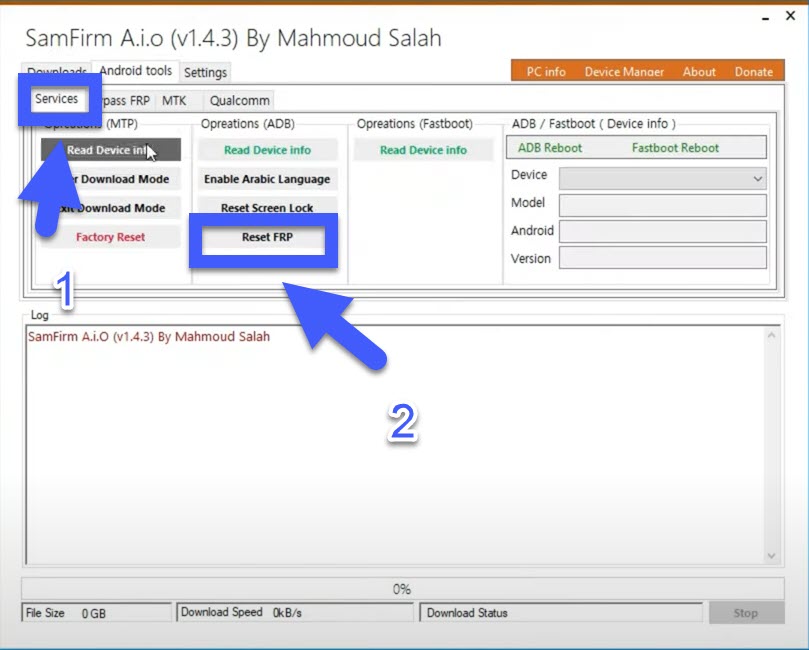
- Download the SamFirm Tool Free FRP Remove Tool on your computer and RunSamFirm.exe
- Choose service then click on Reset FRP.
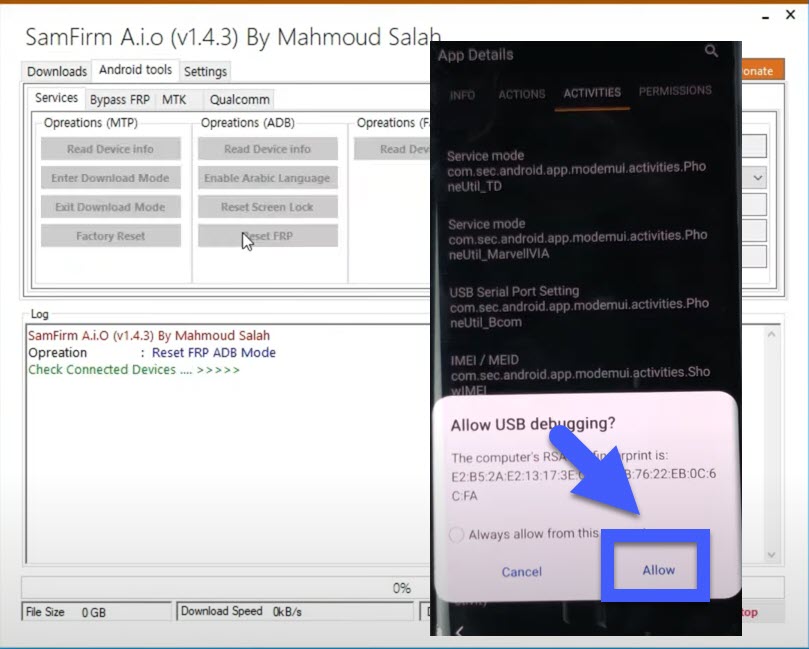
- Allow USB Debugging on your Samsung Tab S6 Lite device.
- The FRP Bypass Gmail lock on your Samsung Tab S6 Lite is Done, and your device is rebooting automatically.
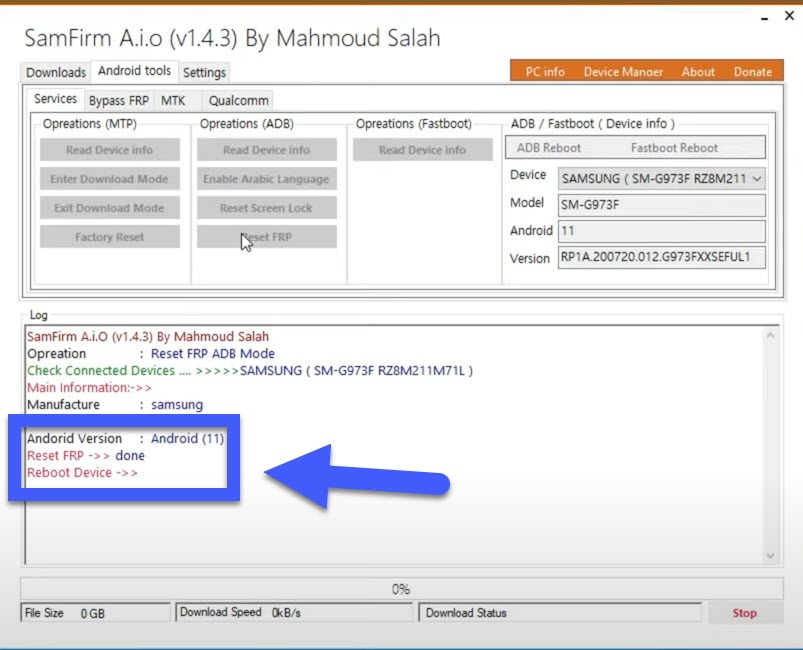
- That’s it! you have successfully FRP Bypass Samsung Tab S6 Lite Gmail with adb Aliance x shield.
How to Fix Too Many Devices on Alliance Shield X app
- Go to: https://alliancex.org/
- Click on Login & sign in with your Alliance Shield account then click on Manage Devices.
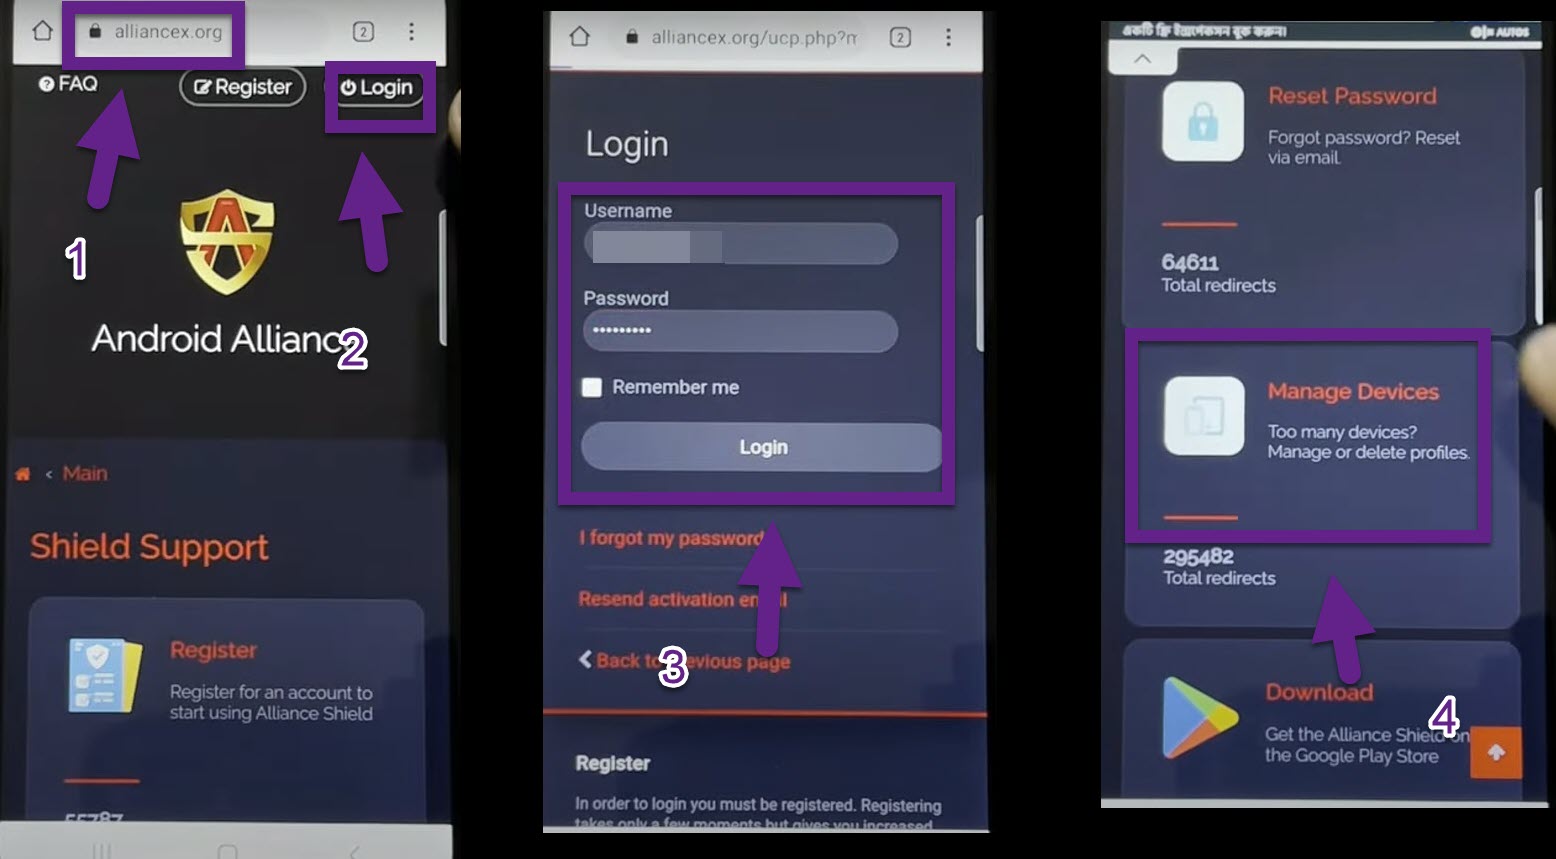
- Login in with your Alliance Shield account again then delete all device then click OK.

0 Comments